Step 4: First analysis
First Analysis
After successfully completing the set-up, your the tool will perform its first analysis on your project.
1. Initial Analysis
The first analysis is automatically triggered on your project’s default branch (typically called main or master).

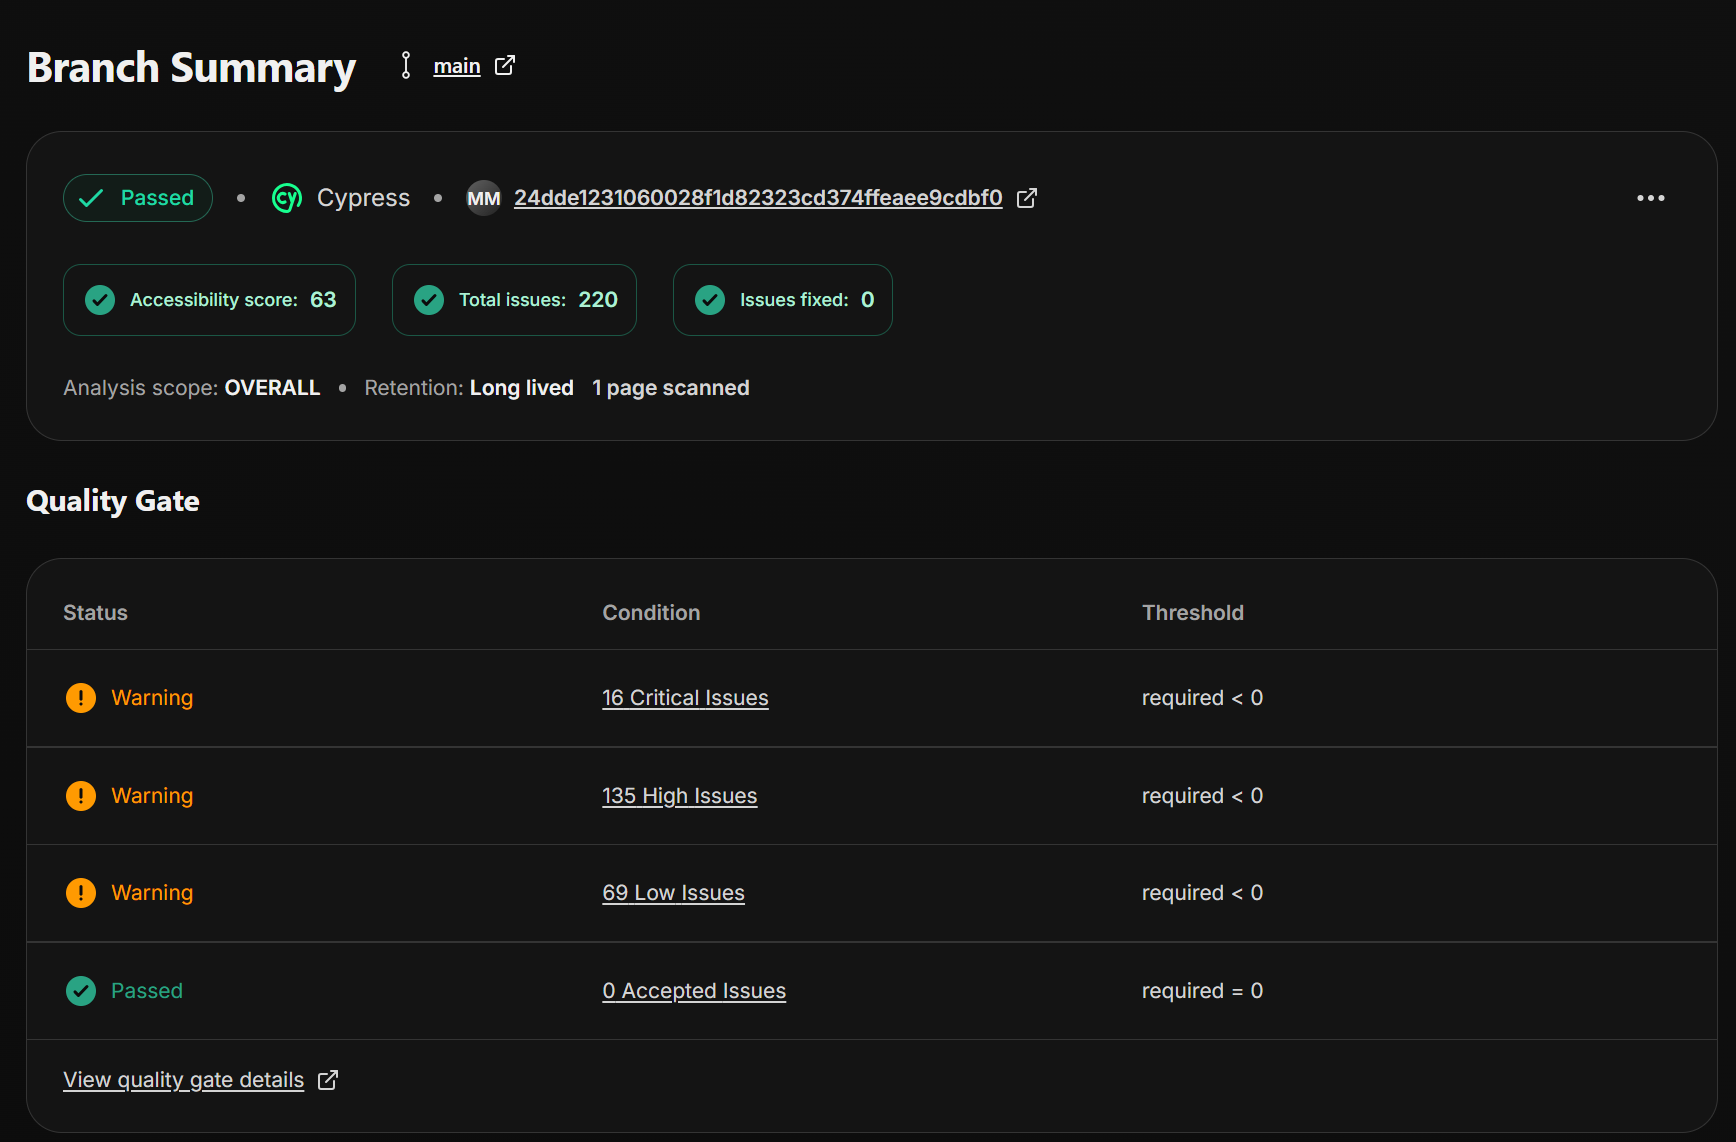
The first analysis scope is “OVERALL” all a11y issues will be flagged in the scan
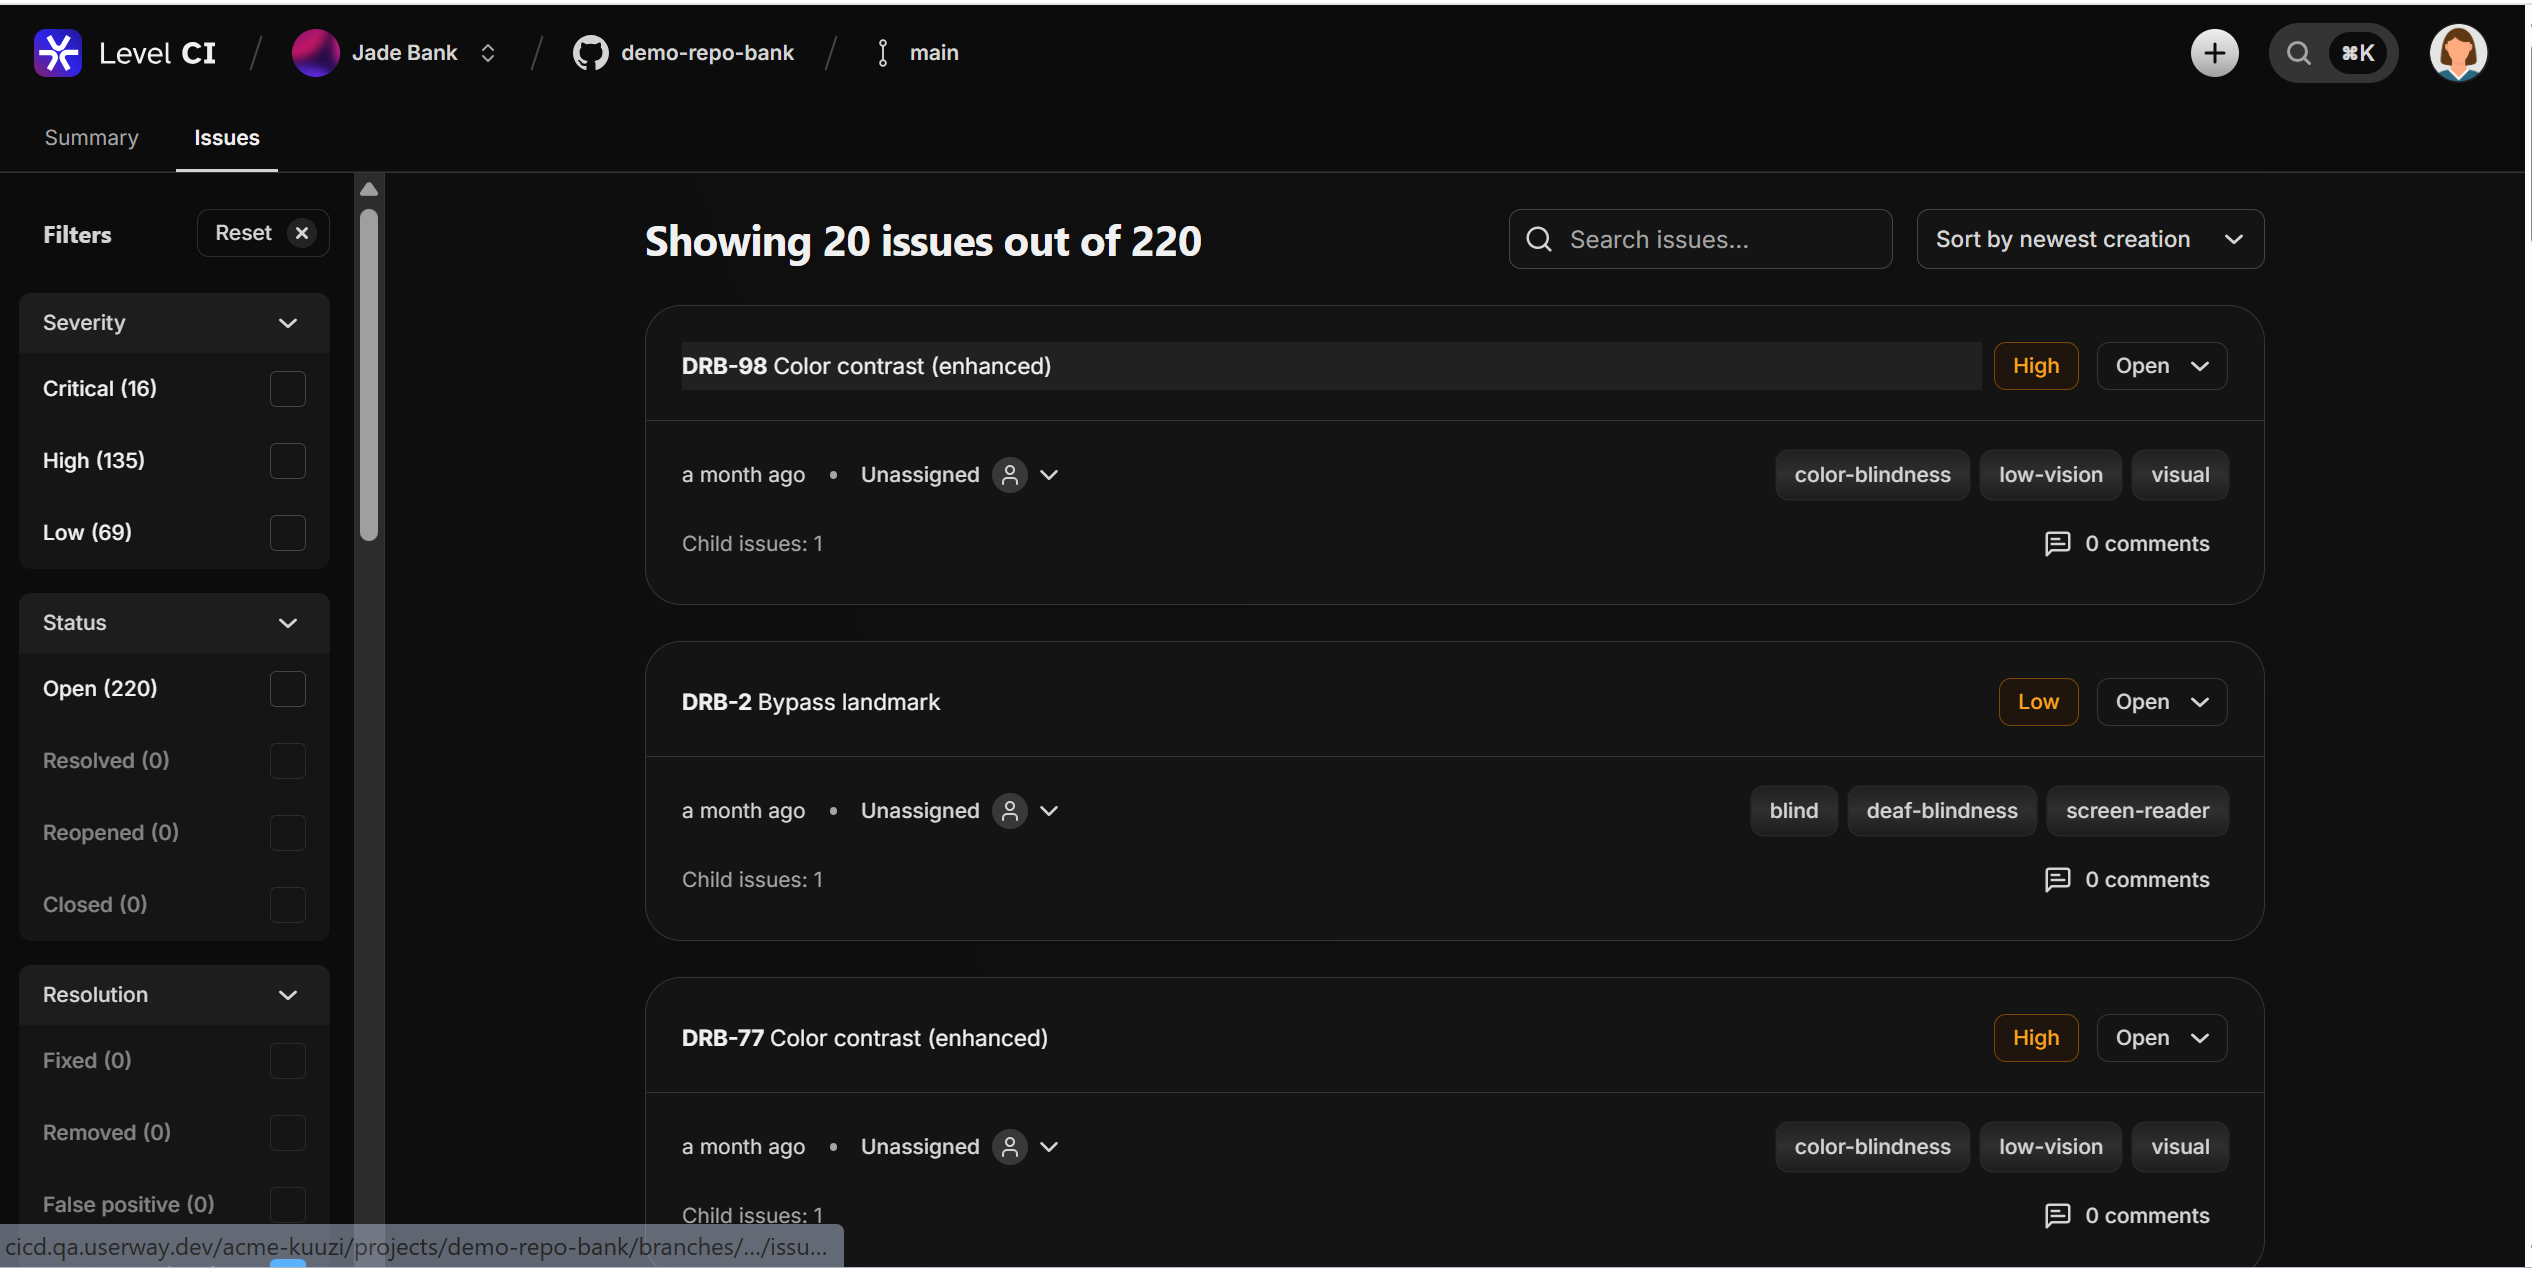
All issues for the main branch will be flagged in the first a11y run , when the user clicks on “View all issues” all issues will be visible in the level CI dashboard.
2. Ongoing Analysis
Going forward, your the tool will automatically trigger a new analysis every time you make changes to the main branch, whether it’s through:
- Direct pushes
- Pull request merges
- Branch merges
3. Workflow Overview
3.1 Commit and Push
Make changes to your code and push them to the repository.
3.2 Review Check Status
Monitor the status of your changes to ensure everything is processed correctly.
3.3 Troubleshoot
If there are issues, review the logs and resolve any problems.
3.4 Review Analysis Results
Once the analysis is complete, review the results to identify any potential issues or areas for improvement.
3.5 Adjust the Accessibility Quality Gate
Modify the A11y Quality Gate if needed to improve the overall accessibility quality of your code.
3.6 Optionally Re-run the Analysis
If you’ve made changes or fixes based on the analysis, you can re-run the analysis to verify the improvements.